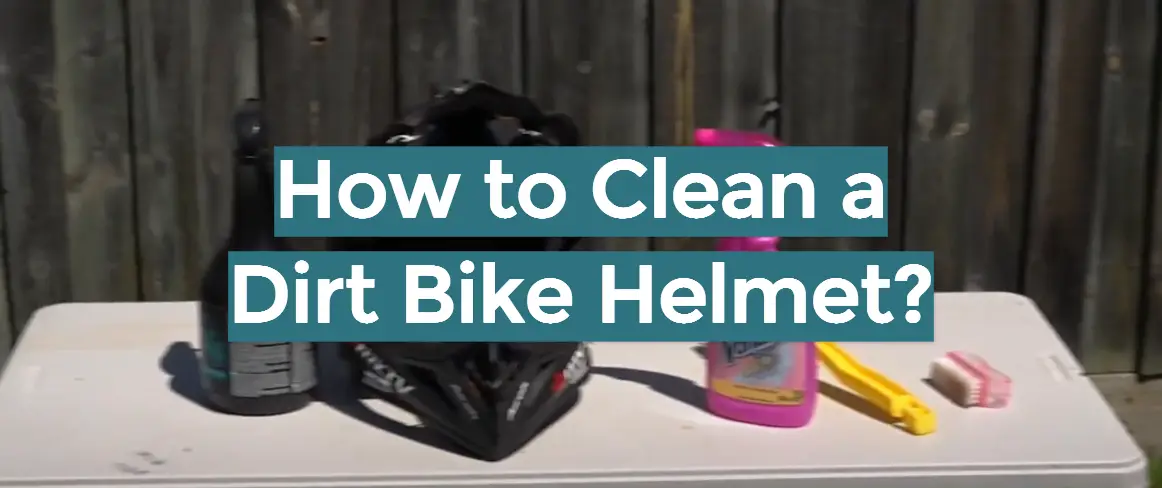
Are you a dirt bike rider who loves the thrill of speeding across muddy terrain? If so, you know your helmet is essential for protecting your head from bumps, hits, and falls. But did you know that it needs regular cleaning to stay in its best condition? Follow this complete step-by-step guide to learn how to keep your dirt bike helmet clean! With the correct supplies and maintenance steps, you’ll be riding with a sparkling fresh helmet in no time.
Table of Contents
What is a Dirt Bike Helmet?
A dirt bike helmet is a specialized type of protective headgear designed specifically for off-road motorcycling. Off-road helmets usually offer more coverage than regular motorcycle helmets, with larger visors and face protection. They are also typically heavier and sturdier to provide greater protection in the event of an accident or crash.
Dirt biking is an exciting and adrenaline-filled sport, but it’s important to keep safety in mind. Wearing a quality dirt bike helmet can help protect your head and provide valuable peace of mind while riding. Make sure to do your research when purchasing a dirt bike helmet, as some may offer more protection than others. Additionally, you should always remember to wear the appropriate clothing and protective gear when riding off-road.
By taking the necessary steps to ensure your safety on the trail or track, you can enjoy the thrilling ride that dirt biking has to offer for years to come [1].
Steps to clean a dirt bike helmet
Cleaning your dirt bike helmet regularly is an important step in maintaining its condition and ensuring that it remains safe for use. Here are some supplies you will need to get started:
- Soft clothes or sponges
- Mild dish soap
- Warm water
- Rubbing alcohol
- Vinegar
- Bucket
- Soft brush (optional)
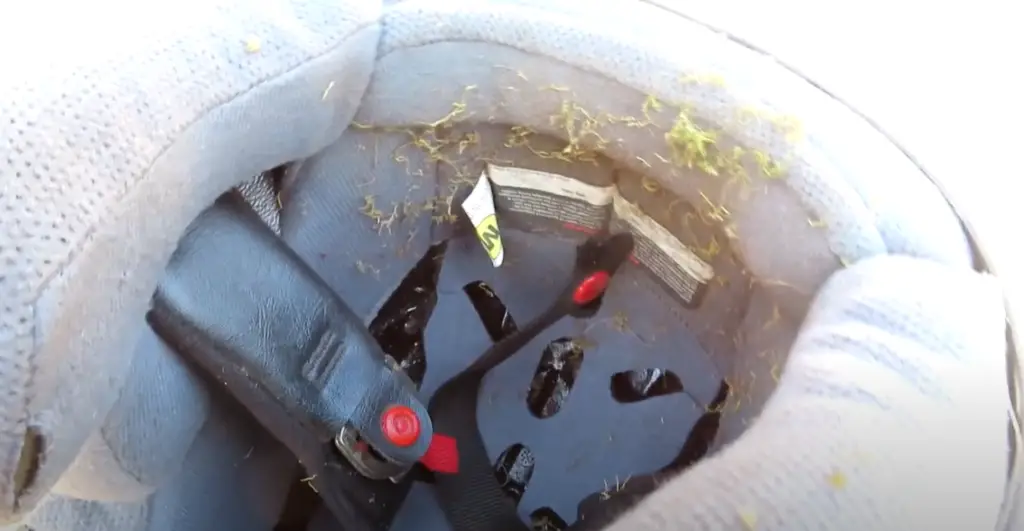
Step 1 Remove excess dirt and debris
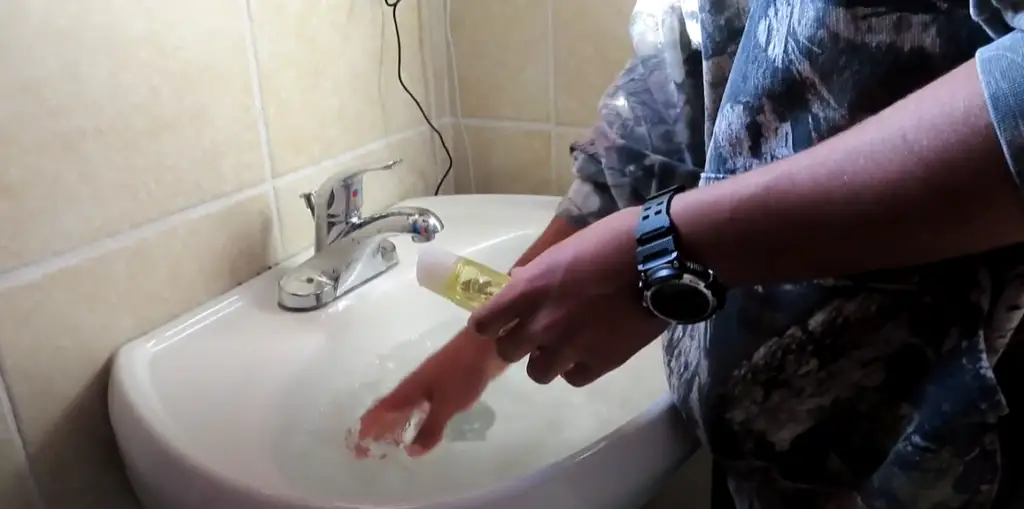
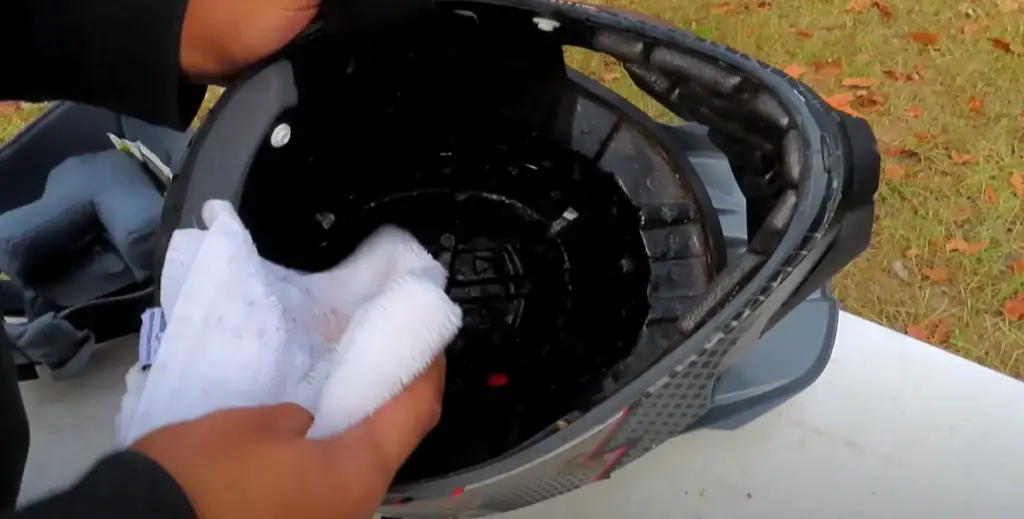
The first step in cleaning your dirt bike helmet is to remove any excess dirt or debris that may have accumulated. Use a soft cloth or sponge, dipped in some warm water and mild dish soap, to wipe down the exterior of the helmet. You can use a brush for any stubborn grime, but make sure it’s not too hard or abrasive as this could damage the helmet’s surface.
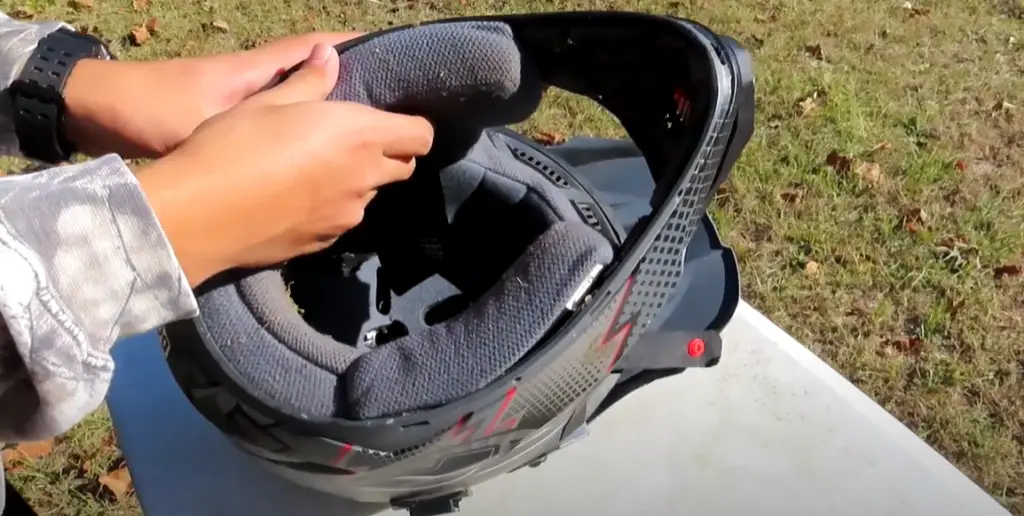
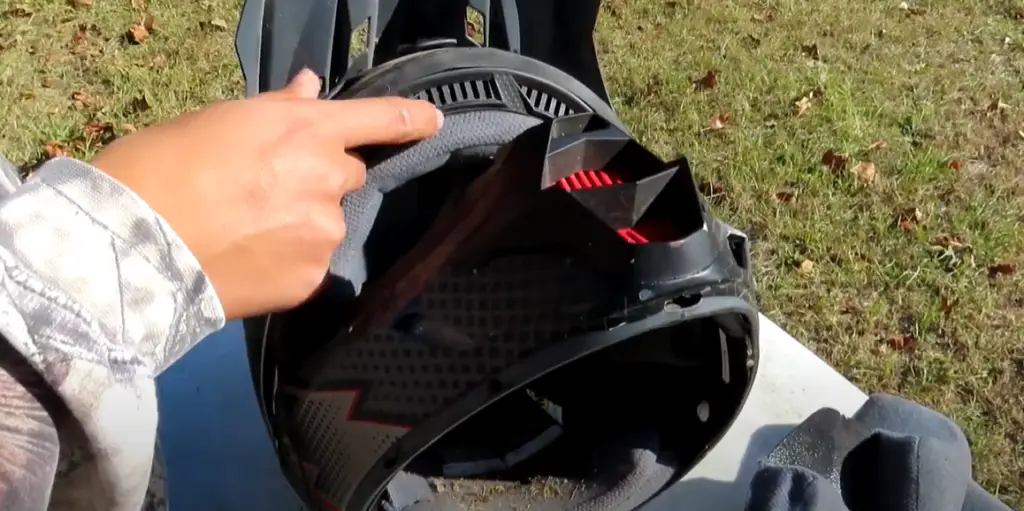
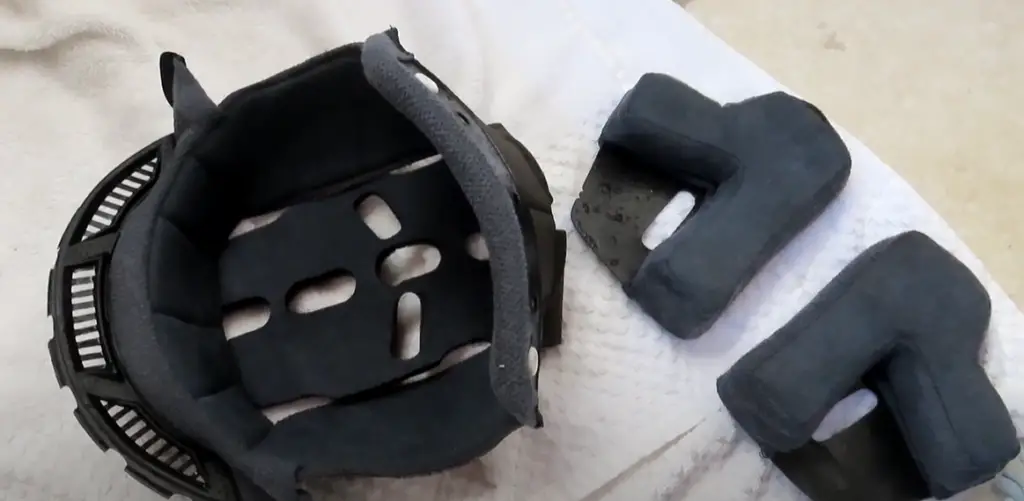
Step 2 Clean the interior padding and fabric
Next, focus on the inside of your helmet. Remove all pieces of padding or fabric that are removable and hand wash them with mild dish soap. If necessary, you can use an old toothbrush or soft-bristled brush to scrub away any hard-to-remove dirt or grime. Once clean, reassemble the padding and fabric into the helmet and allow it to air dry before using it again.
Step 3 Sanitize the exterior with rubbing alcohol
Once you have cleaned the inside of your helmet, use a soft cloth dampened with rubbing alcohol to sanitize the exterior surface. This will help kill any bacteria or other germs that may be present on the surface of your helmet. Make sure to thoroughly wipe down all parts of your helmet (including straps) with rubbing alcohol. Allow the helmet to air dry before putting it back on.
Step 4 Disinfecting with vinegar
For an extra layer of disinfection, mix one part white vinegar with four parts warm water in a bucket or basin. Submerge your dirt bike helmet and straps in the mixture for 10-15 minutes. This will help to kill any remaining bacteria on the surface of your helmet, as well as remove any lingering odors. After soaking, rinse your dirt bike helmet thoroughly with clean water and allow it to air dry before using it again.
Step 5 Allow drying and storage
Once you have finished cleaning your dirt bike helmet, allow it to air dry before using it again. Make sure to store your helmet in a cool, dry place away from direct sunlight when not in use. This will help keep the helmet clean and prevent any buildup of dirt or debris on its surface.
Step 6 Pre-ride preparation
Make sure to inspect your dirt bike helmet before each ride. Check for any signs of damage, including cracks or dents in the shell and straps that are frayed or worn. Additionally, make sure the fit of your helmet is still snug and secure; an ill-fitting helmet can be dangerous while riding. If you notice any issues with your helmet, it’s best to replace it as soon as possible to ensure optimal safety [2].
How to clean your motocross helmet liner?
Step one – Remove the helmet liner
Before you begin cleaning your motocross helmet liner, remove it from the actual helmet and place it on a flat surface. Make sure to use a large enough area so that the liner can be spread out evenly while you clean it.
Step two – Place in a laundry garment bag
A garment bag will help keep the liner from snagging on any items in your washing machine. Once you have placed it in the bag, close it tightly so that there won’t be any dust or dirt left behind while washing.
Step three – Wash with cold water and gentle soap
Using a mild detergent, set your washing machine to cold water and use a delicate cycle to avoid damaging the helmet liner’s material. You can also add some fabric softener to make sure the liner feels soft once it is finished washing.
Step four – Dry on low heat setting
To ensure that your motocross helmet liner does not shrink after being washed, dry it using a low-heat setting on your dryer. This will also help make sure that the colors don’t fade as quickly.
Step five – Reassemble your helmet liner
Once the liner has been washed and dried, reassemble it in the helmet and check to see if any areas need further cleaning. If so, repeat steps two through four until the entire liner is clean. And you’re done! With just a few simple steps, you can keep your motocross helmet liner clean and lasting longer.
Helmet Care Do’s and Don’ts
When it comes to caring for your helmet, there are a few important do’s and don’ts that you should keep in mind.
Do’s:
- Read and follow the instructions provided by the manufacturer of your helmet.
- Clean your helmet regularly with mild detergent and warm water using a soft cloth or sponge.
- Store your helmet away from heat sources like direct sunlight or hot surfaces as high temperatures can warp the integrity of the shell.
- Replace your helmet every 5 years or if you experience an accident/crash.
- Make sure to wear your helmet snugly on your head to ensure proper protection.
Don’ts:
- Don’t use harsh cleaners or abrasive materials when cleaning the helmet, as these can damage the shell and interfere with its protective features.
- Don’t leave your helmet in a hot car during the summer months
- Don’t paint or customize your helmet as this could interfere with the fit and safety.
- Don’t drop or throw your helmet carelessly as this may cause damage to it.
- Don’t wear a used/second-hand helmet as they may not provide adequate protection if they are damaged.
If you take proper steps to care for your helmet, it will last longer and provide you with years of safe riding! So, do yourself (and fellow riders) a favor and follow the above dos and don’ts of proper helmet care [3].
What Is The Lifespan Of A Dirt Bike Helmet?
A dirt bike helmet typically has an expected lifespan of 3 to 5 years. However, this timeline is dependent on how often and under what conditions the helmet is used. In some cases, helmets may last longer if they are not exposed to extreme temperatures or subjected to frequent drops, knocks, and other wear-and-tear factors. Additionally, riders should consider replacing their helmets more often if they are consistently participating in intense off-road activities that require a high level of protection and safety.
Finally, if you have any doubts about your helmet’s condition or are unsure whether it should be replaced, consult a professional for advice on how to properly inspect and maintain your dirt bike helmet. By following these guidelines, you can ensure that you and your passengers remain safe while enjoying off-road rides.
FAQ
How do you clean a dirt helmet?
To clean a dirt helmet, start by removing any excess dirt or debris with a soft cloth and warm water. Next, use a mild soap and water solution to scrub the helmet. Allow the helmet to dry completely before applying a protective coating to it. The protective coating will help protect the helmet from scratches and other damage. It’s also important to regularly check your helmet for signs of wear or damage and replace it if necessary. Finally, always store your dirt helmet in a cool, dry place when not in use.
How do you choose the right size for my bike helmet?
When choosing the size for your bike helmet, measure your head circumference just above your eyebrows with a tape measure. Then select an appropriately sized bike helmet that corresponds to your head measurement using a sizing chart. Make sure the helmet fits snugly on your head without being too tight or uncomfortable. It should also sit level on your head and not block your vision in any way. Additionally, make sure the straps are adjusted correctly so they fit securely around your ears and chin. Finally, double-check all these adjustments before each ride to ensure maximum safety and comfort while you’re riding.
How do I adjust my bike helmet?
Adjusting a bike helmet is fairly simple – start by making sure the inside of the helmet is centered on your head and sitting level across your forehead. Then loosen or tighten the side straps until they form a “V” shape under each ear lobe and come together just below your chin. Make sure the straps are snug but not too tight, and always check to make sure they haven’t come loose while you’re riding. Finally, adjust the rear stabilizer until it fits snugly against your head without putting any pressure on your forehead or temples.
What is a good maintenance routine for my bike helmet?
A good maintenance routine for your bike helmet should include regular inspections and cleaning. Inspect the helmet before each ride – look for cracks or signs of wear that may have developed since the last time you used it. Clean it with warm water and mild soap after each ride, and if possible apply a protective coating to help protect it from scratches or other damage caused by everyday use. Additionally, store your helmet in a cool, dry place when not in use and replace it if it becomes too worn or damaged. By following these simple steps you can help ensure your helmet is always in good condition and ready to protect you while out on the road.
What type of bike helmet should I buy?
The type of bike helmet you should buy depends on what kind of riding you do most often. For instance, mountain bikers may want to opt for full-face helmets that provide added protection from branches and rocks. Road cyclists may prefer an aerodynamic option with fewer features but more ventilation. Commuters might look for something lightweight, durable, and stylish that can handle all kinds of weather conditions. Ultimately, the best way to choose a bike helmet is to try on a few different styles and find the one that fits your head best and offers the level of protection you need.
Can you wash a dirt bike helmet?
Yes, you can safely wash a dirt bike helmet. Start by removing any excess dirt or debris with a soft cloth and warm water. Next, use a mild soap and water solution to scrub the helmet. Allow it to dry completely before applying a protective coating to it. You should also regularly check your helmet for signs of wear or damage and replace it if necessary – this will help ensure your safety while out on the track. Finally, always store your dirt helmet in a cool, dry place when not in use.
What should I clean my bike helmet with?
It is best to clean your bike helmet with mild soap and a warm water solution. Avoid using harsh chemicals or abrasive cleaners, as these can damage the material of the helmet and compromise its protective qualities. If you need to remove any tough stains or dirt buildup, use a soft cloth dampened with warm soapy water. Be sure to rinse the helmet thoroughly afterward and allow it to air dry in a cool, dry place when finished.
What type of cleaning products should I avoid?
When cleaning your bike helmet it is important to avoid using any harsh chemicals or abrasive cleaners, as these can damage the material of the helmet and reduce its protective qualities. Additionally, stay away from products that contain alcohol, bleach, ammonia, or other solvents, as these can cause discoloration and fading. Finally, never use any products with a petroleum base, as this can break down the material of the helmet over time. If in doubt, always check the label for warnings about the product before using it.
Are there any special considerations when cleaning a bike helmet?
Yes, it is important to take certain steps when cleaning your bike helmet to ensure you do not damage it or reduce its protective qualities. Avoid using any harsh chemicals or abrasive cleaners, and opt instead for mild soap and warm water solutions. Additionally, be sure to rinse the helmet thoroughly afterward and allow it to air dry in a cool, dry place when finished. It is also important to inspect the helmet regularly for any signs of wear or damage and replace it if necessary.
How long does it take to clean a dirt bike helmet?
It typically takes about 10 minutes to clean a dirt bike helmet. Start by removing any excess dirt or debris with a soft cloth and warm water. Then use a mild soap and water solution to scrub the helmet, being sure to rinse it thoroughly afterward. Allow the helmet to air dry in a cool, dry place before applying a protective coating if desired. Finally, inspect the helmet regularly for signs of wear or damage and replace it if necessary – this will help ensure your safety while out on the track.
How long can a dirt bike helmet be used without washing it?
It is recommended to clean your dirt bike helmet at least every 6 months, or whenever it becomes especially dirty. Depending on the frequency of use, it may be necessary to clean more often than this. Additionally, you should inspect the helmet regularly for signs of wear or damage and replace it when necessary – this will help ensure your safety while out on the track.
Where can I buy a dirt bike helmet?
You can purchase a dirt bike helmet from a variety of retailers, both online and in-store. When shopping for your helmet, it is important to consider the type of riding you plan on doing and the level of protection you need. Look for helmets that are certified by the Department of Transportation (DOT) or Snell Foundation to ensure they meet industry safety standards, and be sure to read through all product details before making a purchase. Finally, always choose a helmet that fits properly – this will help keep you safe out on the track.
What should I be careful of when cleaning my helmet?
When cleaning your helmet, it is important to take certain steps to ensure you do not damage it or reduce its protective qualities. Avoid using any harsh chemicals or abrasive cleaners, and opt instead for mild soap and warm water solutions. Additionally, be sure to rinse the helmet thoroughly afterward and allow it to air dry in a cool, dry place when finished. Finally, inspect the helmet regularly for signs of wear or damage and replace it if necessary – this will help keep you safe out on the track.
How long do dirt bike helmets last?
The lifespan of a dirt bike helmet depends on the frequency of use and how well it is maintained. Generally speaking, it is recommended to replace your helmet every three to five or when signs of wear become apparent. Additionally, always inspect your helmet regularly for any signs of wear or damage and replace it as soon as possible – this will help ensure your safety while out on the track.
Useful Video: What’s the best way to clean your helmet – The MXTV Blog
Conclusion
Cleaning a Dirt Bike Helmet is a simple and necessary task to ensure the protection of your head. With just a few basic supplies, you can perform this job quickly and easily. A damp cloth should be used for wiping away dirt and oil from the surface of the helmet, followed by a dry cloth to remove any remaining moisture. You may need to use specific products such as saddle soap or plastic cleaners if there are more stubborn stains or debris that need to be removed. Be sure to follow product directions carefully when working with specialty items. After cleaning your helmet, store it in a cool, dry place until needed again. Following these steps will help keep your Dirt Bike Helmet clean and ready for wear whenever you hit the trails!
References
- https://helmethacks.com/clean-a-dirt-bike-helmet/
- https://www.mxstore.com.au/blog/how-to-guides-tutorials/how-to-wash-your-motocross-helmet/
- https://motodomains.com/how-to-clean-your-dirt-bike-helmet