Are you a fan of cosplay? Have you ever dreamed of making your own custom helmet to complete your look? If so, this article is for you! Here we will provide answers to frequently asked questions about creating a cosplay helmet, product reviews on the necessary materials, and useful tips to make the process easier. With our help, creating a totally unique cosplay helmet can be easier than ever. So let’s get started!
Table of Contents
How to Make a Foam Cosplay Helmet?
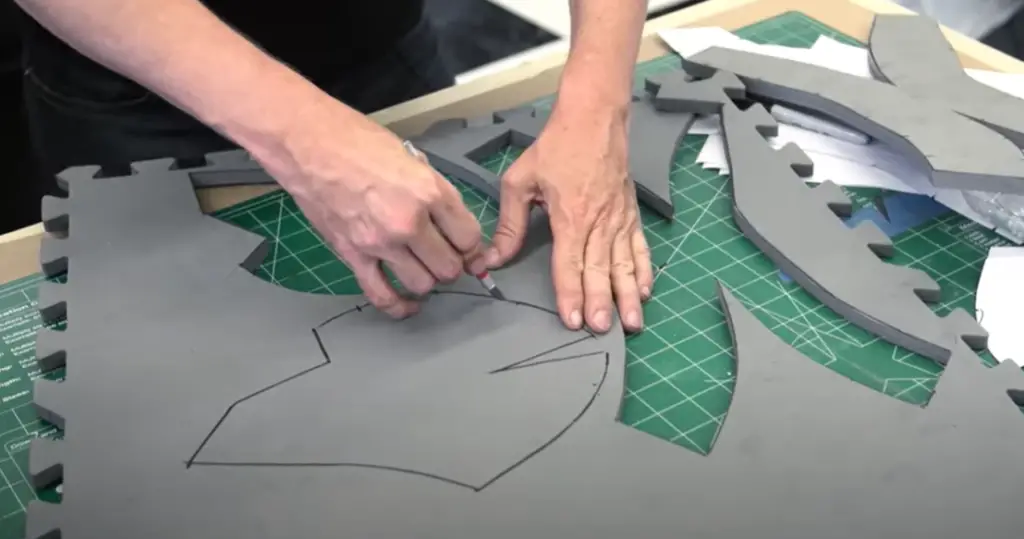
Trace the pattern onto EVA foam and cut it out
Once you have acquired your EVA foam, trace the pattern of your helmet onto it with a pencil. Once you’ve done that, use a sharp knife to cut out the shape you’ve just drawn. Be sure to take extra care when cutting, as mistakes can be difficult or impossible to correct and may spoil the look of your helmet. [1]
Glue together your basic foam helmet
Once you have cut out the individual pieces of your helmet, it’s time to glue them together. To do this, apply a generous amount of contact cement or hot glue along the edges of each piece and press them firmly together. Make sure to keep some kind of weight on top while the glue dries, as this will help the pieces adhere properly. [1]

Create and cut out embellishments
Now that you have created a basic helmet from EVA foam, it’s time to add some details. You can do this by cutting out additional pieces of EVA foam and gluing them onto the surface of your helmet. Here, you can be as creative as you like – adding spikes, ridges or anything else you can think of to make your helmet unique. [1]
Shape the EVA foam pieces with a heat gun
Once you have all of your pieces glued in place, it’s time to give your helmet shape. To do this, use a heat gun or hair dryer to heat up the EVA foam and then work it into the shape you want. Be careful not to overheat the foam as this can cause it to melt or warp.[1]
Attach the embellishments to your foam helmet
Now that your helmet is shaped the way you want it, it’s time to attach all the pieces of embellishments. To do this, simply glue them onto the surface using contact cement or hot glue. After they are attached, use a heat gun to smooth out any rough edges and make sure everything is firmly in place. [1]
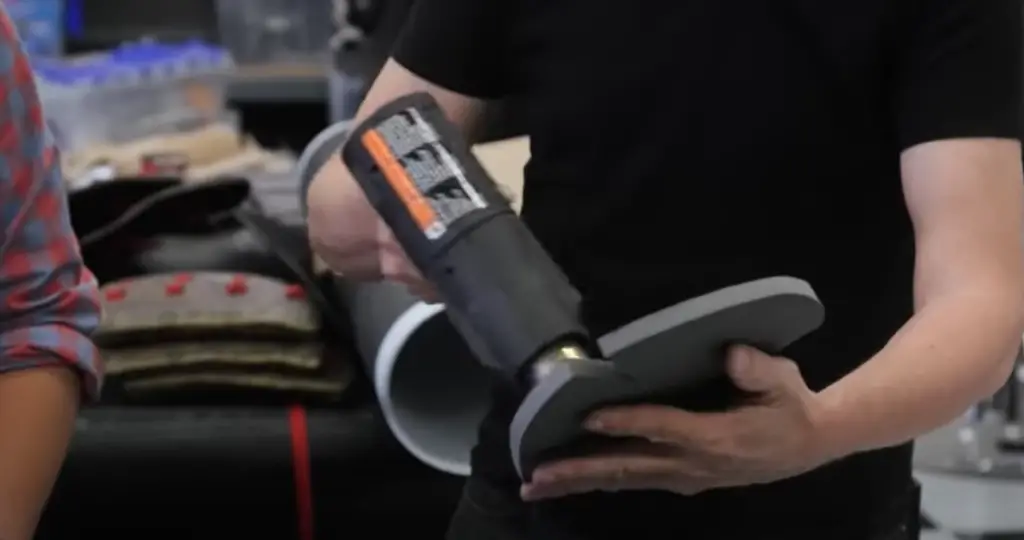
Smooth the edges with a Dremel Rotary-Tool
Once all the pieces are in place, it’s time to make sure everything is smooth. To do this, use a Dremel rotary-tool with a sanding attachment to gently shape and sand any rough edges on your helmet. This will help ensure that your helmet looks as professional as possible when you’re done. [1]
Apply googly eyes
Once your helmet is properly shaped, you can add any extra details to make it unique. For example, you could glue on some googly eyes for added effect or paint it with glitter for a sparkly touch. You can also add feathers, shells or any other bits of decorations that you like! [1]
Apply a primer to your foam helmet
Now that your helmet is finished, it’s time to give it some protection. To do this, apply a primer paint to the entire surface of your helmet with a spray gun or brush. This will help protect your helmet against any damage caused by wear and tear over time.[1]
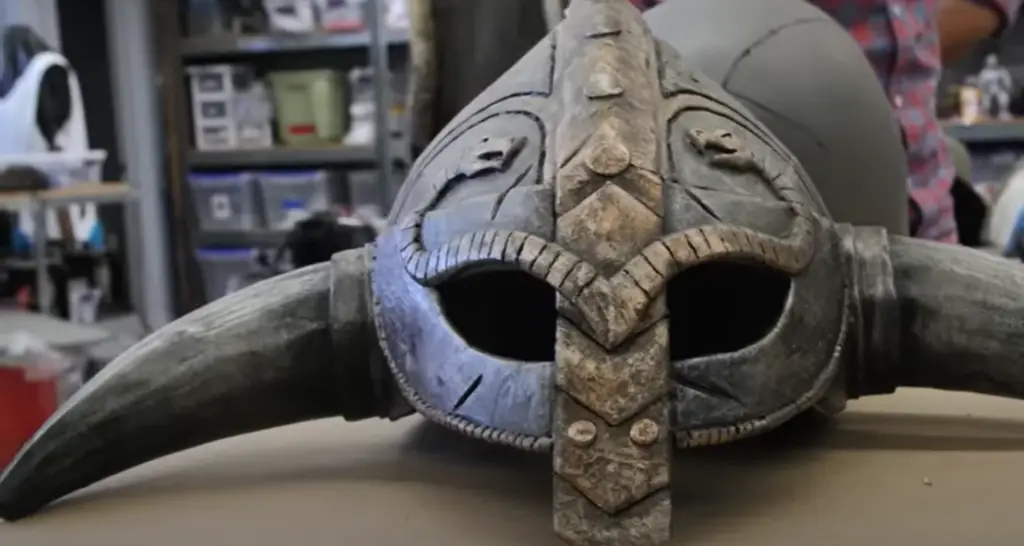
Airbrush the helmet
Finally, it’s time to give your helmet the look you want. To do this, use an airbrush to apply a layer of paint in any color you like. If you want a more intricate design, consider using stencils or freehand painting with a brush. Once the paint is dry, your cosplay helmet is now ready to be worn!
Creating a cosplay helmet is an exciting project that can bring your costume to life. With the right materials and some helpful tips, you can make a unique and impressive helmet in no time. So don’t wait – grab your supplies and get started on your cosplay helmet today! [1]
How to Make a Cosplay Helmet?
Step 1: Materials
The first step to making a cosplay helmet is gathering the right materials. Depending on what kind of helmet you are trying to make, you will need different materials. For example, if you’re wanting to make a plastic or foam helmet, you’ll need sheets of either material, and adhesive such as hot glue or superglue. If you’re looking to make a metal helmet, you’ll need sheet metal and tools such as a grinder for cutting the metal. No matter what kind of helmet you’re making, it’s important to have all the materials on hand before you start so that you don’t have any delays or unexpected costs during the process. [3]
Step 2: Paper Model
Once you have your materials, the next step is to make a paper model of the helmet. This will act as a template for you to use when cutting and shaping your material. It is much easier to do this step with a hard copy of your design rather than using digital software – that way, it’s easy to see how certain shapes or sizes will fit together. You can also use this paper model to measure the materials you need and make sure everything is cut correctly. [3]
Step 3: Fiberglass
Once you have your paper model and the right materials, it’s time to begin building your helmet. If you’re making a plastic or foam helmet, you’ll want to start by fiberglassing the pieces together. This is done by putting a layer of fiberglass cloth between two layers of resin on the back of the piece. The resin is then heated and left to cure, bonding the two pieces together. This makes your helmet much stronger and more durable than if you simply glued them together. [3]
Step 4: Bondo
The next step is to use bondo to finish the helmet. Bondo is a two-part epoxy that you mix together and apply over the fiberglassed pieces. It’s important to spread it evenly, as this will be what gives your helmet its shape and strength. You can also use sandpaper or a file to smooth out any bumps or ridges after it has cured. [3]
Step 5: Sanding
After your bondo has cured, it’s time to sand it down. This is done using a sandpaper with a medium grit. Once you’ve finished sanding, you can then begin painting the helmet whatever color or design you like. It’s important to use multiple layers of paint for best results – this will ensure that your helmet looks as professional and polished as possible. [3]
Step 6: Painting
When your helmet is sanded down, you can begin painting it. It’s important to use multiple layers of paint for best results – this will ensure that your helmet looks as professional and polished as possible. If you’re using a metallic finish, make sure you prime the surface beforehand. Once you’ve finished painting, you can then add any other details such as logos or symbols that you want. [3]
Step 7: Visor
The final step to making a cosplay helmet is adding the visor. You can either purchase pre-made ones or make them yourself using acrylic sheets and other materials. Whichever option you choose, make sure that it fits correctly and securely onto the helmet. Once your visor is in place, your helmet is complete! [3]
Step 8: Last Details
Now that your helmet is finished, you can add any additional details such as straps or padding to make it even more comfortable and secure. Additionally, if you want to add lights or other electronics to your helmet, now is the time to do so. Once everything is in place, you’re ready to show off your new cosplay helmet! [3]

How to Make a Cardboard Costume Helmet?
Step 1: Materials
For this project, you’ll need cardboard, glue, scissors or a box cutter, measuring tape and markers. [4]
Step 2: First Form the Base
The first step is forming the base of your helmet. Start by measuring out a large rectangular piece that is big enough to fit over your head comfortably. Cut it out and glue the edges together, creating a cylindrical shape. This will be the main body of your helmet. [4]
Step 3: Making the Dome Frame
Next, you’ll need to create the dome frame. Start by cutting out two circles that are slightly larger than your head. Glue one of them onto the top of your cylindrical base and leave the other circle separate. [4]
Step 4: Filling in the Dome
Once you have the dome frame in place, fill it out with more cardboard. Cut out triangular pieces and glue them all around the top to create a full dome shape. [4]
Step 5: Final Shaping
At this point, you can start adding any details that you want to personalize your helmet. Cut out pieces of cardboard and glue them on for extra decoration. You can also use markers or paint to give it a more finished look. [4]
Step 6: Add Details
Finally, add some straps or padding to secure the helmet in place. You can use foam, ribbon, or elastic for a comfortable fit. [4]
Step 7: Painting/Finishing
If you haven’t already, you can use paint or markers to give your helmet a finished look. Get creative and have fun with it!
And there you have it–your very own homemade cosplay helmet is ready for action! With just a few simple steps and materials, you can create an amazing accessory for any costume. Best of luck and have fun! [4]
Guidelines and Tips for Crafting Cosplay Helmets
For those of us who love cosplay, an intricately designed and well-crafted helmet can be the crowning touch on a costume! But with so many options available for cosplay helmets out there, it can be overwhelming to try and decide which one is right for you.
Below are some guidelines and tips for crafting a cosplay helmet that looks great and fits perfectly.
- Get the right measurements: Measure your head circumference and check what size helmet is best for you using a chart or calculator online. Make sure to also measure the distance between your eyes, as this will help you decide which type of visor is best for viewing comfortably.
- Choose the right material: Depending on your budget, you’ll want to choose a material that is strong enough to stand up to wear and tear, but still light-weight. Some popular choices are fiberglass, plastic, or foam.
- Use a template: Making a template can help you visualize what shape and size the helmet should be. You can download templates online or create one of your own.
- Make sure there’s no visible gap: When you attach two parts of the helmet together, make sure there’s no visible gap between them. This will help ensure a more professional and polished finished look.
- Include ventilation holes: Be sure to include multiple air vents in the helmet so you won’t get too hot while wearing it.
- Add padding for comfort: Add foam padding to the inside of your helmet for extra protection and comfort.
- Don’t forget the finishing touches: To give it an even more finished look, paint the helmet and add any decorations, such as stickers or gems. [2]
FAQ
How do cosplayers make helmets?
Cosplayers make helmets in a variety of ways, depending on the type of helmet and their personal preference. Generally speaking, most cosplayers will use foam or Worbla (thermo-plastic material) to construct their helmets. With these materials, many create a sculpted base that they then cover with fabric, paint, and other.
What material is used for cosplay helmets?
Most cosplayers use materials such as EVA foam and Worbla (thermo-plastic material) to create the base of their helmets. Some more experienced cosplayers may also work with thermoplastics, such as Smooth-On or Apoxie Sculpt, for a higher quality finish.
How can I make a helmet at home?
Making a helmet at home is not as hard as it may sound. All you need are the right materials, some patience, and some basic crafting skills. The first step is to get the base of your helmet ready. You can use EVA foam or Worbla (thermo-plastic material) for this. Once the base is ready, you can then begin to add details such as fabric, paint, and other materials. Finally, make sure you seal the entire helmet to protect it from the elements and wear and tear. With a little practice and dedication, you’ll be able to create the perfect cosplay helmet for any costume!
What is the best foam for a cosplay helmet?
The best foam for a cosplay helmet is one that is lightweight, durable and easy to work with. EVA foam is the most popular choice amongst cosplayers because it checks all of those boxes. However, some experienced cosplayers may use other types of foams, such as polyurethane or closed-cell foam for added durability. Ultimately, the choice of foam will depend on your individual needs and preferences.
Can EVA foam get wet?
Yes, EVA foam can get wet. However, it is best to keep it away from water and moisture as much as possible. If your cosplay helmet does get wet, immediately remove it and let it dry completely before attempting to wear it again. This will help ensure that the foam retains its shape and structure for years to come!
How thick should EVA foam be for a helmet?
The thickness of EVA foam for a helmet will depend on the design and size of the helmet. Generally speaking, it is best to use at least 1/2 inch thick foam when making a cosplay helmet. However, you may want to go thicker (up to 2 inches) if you are planning on adding lots of details or extra protection. Ultimately, the best way to determine the thickness of your foam is to measure it against the design of your helmet and make adjustments as necessary.
Useful Video: How to Build a Foam Cosplay Helmet!
Conclusion
Now that you know how to make a cosplay helmet, it’s time to get out there and show off your work! Remember, the most important thing is that you are having fun. With a few simple tools and supplies, you can create an amazing piece of artwork perfect for any costume or cosplay event! So grab those materials and get crafting! Good luck, and happy cosplaying!
If you have any further questions about making a cosplay helmet, don’t hesitate to reach out to the experts at Cosplay Crafts. With their help and guidance, you’ll be able to create an amazing one-of-a-kind helmet that will have you feeling like a superhero!
Happy crafting!
References:
- https://www.dremel.com/us/en/projects/how-to/how-to-make-a-foam-cosplay-helmet
- https://thecosplaysite.com/how-to-make-a-cosplay-helmet/
- https://www.instructables.com/How-to-make-a-cosplay-helmet/
- https://www.instructables.com/How-to-make-a-cardboard-costume-helmet/