Making a Vikings helmet is a fun and rewarding project. Not only will you have a unique piece of headwear that is perfect for costume parties or historical reenactments, but you will also have learned a new skill. In this article, we will answer some of the most common questions about how to make a Vikings helmet. We will provide detailed instructions and tips on how to create an authentic-looking helmet that is sure to impress your friends and fellow history buffs!
Table of Contents
Cardboard Viking Helmet
Tools To Build The Helmet
- White card
- Pencil
- Ruler
- Scissors
- Stapler
- Staples
- Tape measure
- A4 white paper
- Paint
- Paint brushes
- Hole punch
- Glue stick
Step-by-Step Guide
Step 1:Make Your Helmet Rim
Cut a long strip of white card that will fit comfortably around your head. Make sure to leave enough extra so that you can staple the two ends together.
Step 2:Make The Helmet Framework
Measure and cut 24 strips of white card that are all the same length. You will need them to be long enough to reach from the rim of the helmet, over your head and down to the other side of the helmet.
Take the paper strip and staple one of the ends to the front of the helmet rim. Make sure that the strips are evenly spaced out. Then , take the other end of the strip and staple it to the back of the helmet.
Now, do the same for the other 23 strips so that you have a complete framework for your helmet.
Take note that the second strip of card crosses over the first one. This will make the helmet stronger.
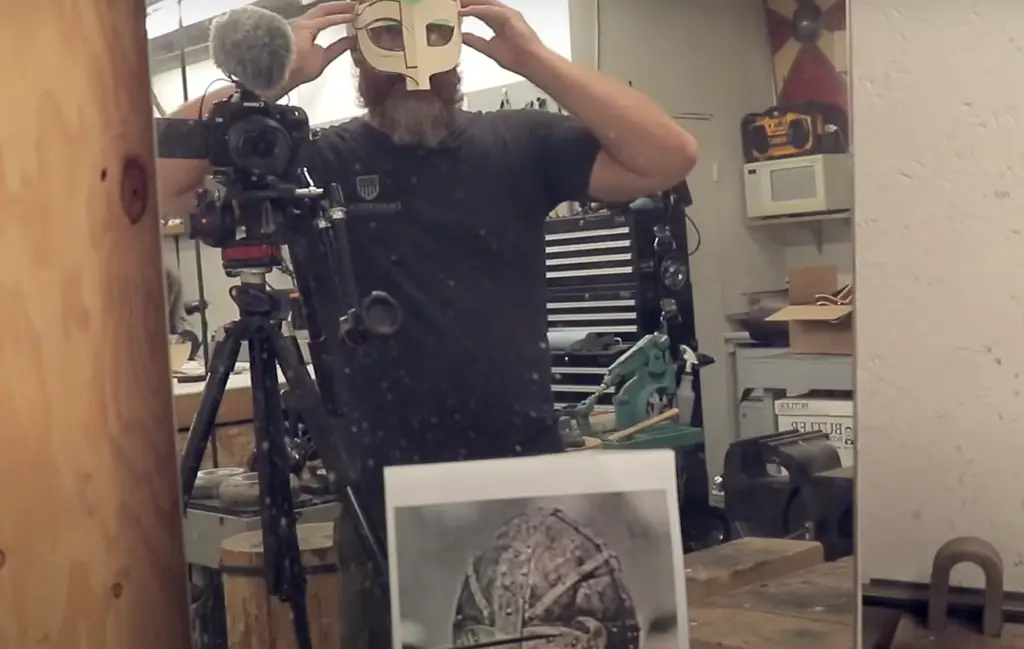
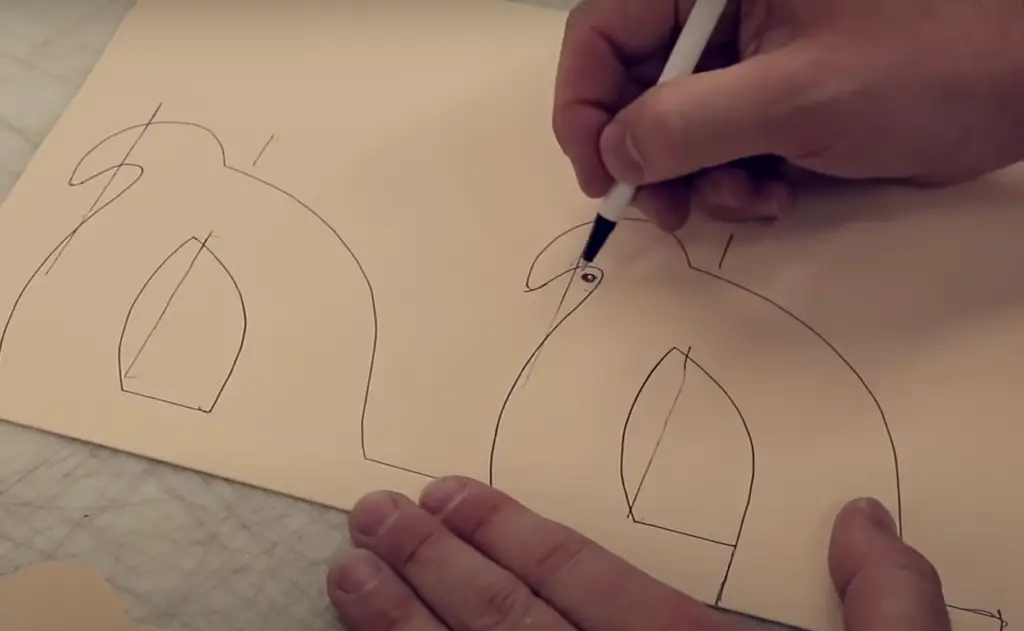
Step 3: Make The Face Guard
In this step you need to make a template. There are 2 ways you can do this:
- Option A: Print out the template at the end of this guide.
- Option B: Draw your own.
If you choose option B, make sure that your face guard is big enough to fit comfortably over your nose and mouth. It should also be wide enough so that you can see clearly out of the eye holes.
To make it you need to draw half of the face guard on a piece of A4 white paper. Then, fold the paper in half and cut out the shape. This will give you a symmetrical face guard that you can then trace onto your card. Cut out the face guard from your card and then punch two holes on either side.
To cut eye holes out, first poke two holes in the card where you want your eye holes to be. Then, cut out the space between the two holes.
Step 4: Make The Iron Rivets
This is an optional step but it will make your helmet look more authentic.
Make sure that the holes are big enough for the paper to fit through. Cut out small circles from the silver paper – these will be your rivets. After that, thread the silver paper through the hole punch .Step 5: Paint The Helmet Parts
You can paint your helmet any color you want. A lot of people choose to make theirs all one color but you could also paint it in traditional Viking colors like silver or bronze. To make your helmet look more realistic, you could even add more than just 1 color. After you have decided on the colors, it’s time to start painting! Start with the face guard and work your way down. Once you have finished painting, leave the parts to dry.
Step 6: Glue It Together
Now it’s time to put your helmet together! First, take the face guard and glue it on the front of the helmet. Make sure that the holes line up with the ones on the helmet rim. Once the glue has dried, glue your silver rivets onto the helmet. [1]
Step 7: Decorate To Taste
There are few ways you can decorate your helmet. You could add horns or fur. You could also paint patterns or symbols onto the helmet. It’s up to you!
That’s it! You have now made your cardboard Viking helmet!
Steel Viking Helmet
Tools To Build The Helmet
- Mild plate steel 18 gauge
- Card stock
- Pencil
- Ruler
- Scissors
- Rivets
- Dome head
- Belt leather
- Nibbler
- Dishing stump
- Dishing hammer
- Planishing hammer
- MIG welder
- Grinding wheel
- Orbital sander with sandpaper (120 grit)
- Polishing wheel
- Buffing wheel
Step-by-Step Guide
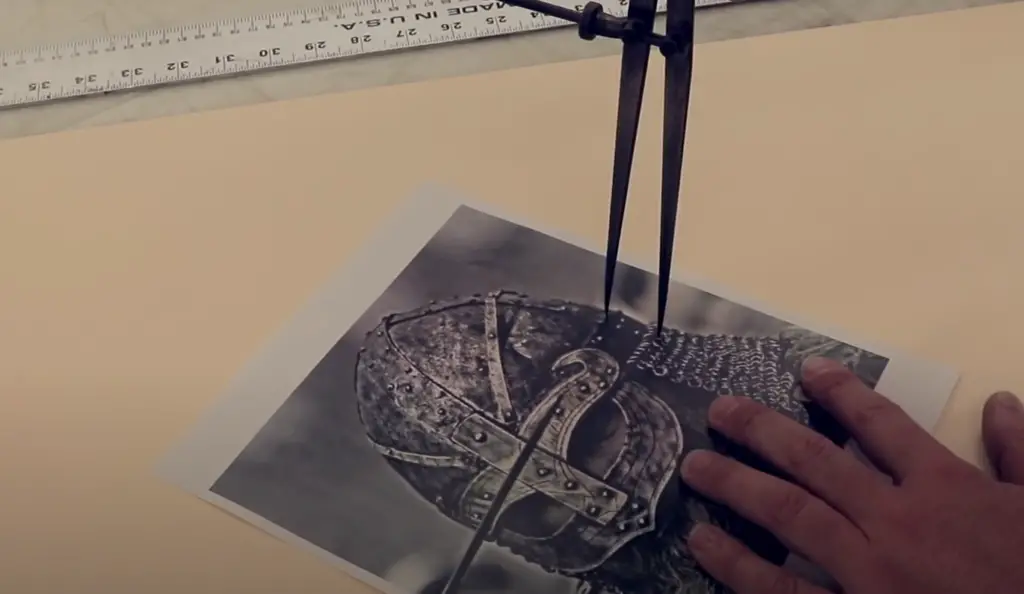
Step 1: Pattern Layout
The first step is to lay out the pattern for your helmet. You can either do this freehand or use a template. If you are using a template, trace the outline of the template onto the card stock. Once you have the basic outline of your helmet, start to flesh out the details. For example, if you want horns on your helmet, draw them on now. You can also add other embellishments at this stage, such as rivets or raised decorations.
When you are satisfied with the design of your helmet, use the scissors to cut out the pattern.
Step 2: Cutting Out Your Shapes
Now that you have your pattern, it’s time to start cutting out the steel. To do this, you will need a nibbler or a jigsaw. If you are using a nibbler, start by making a series of small cuts along the edge of the pattern. Once you have gone all the way around, you can then start to cut out the interior pieces.
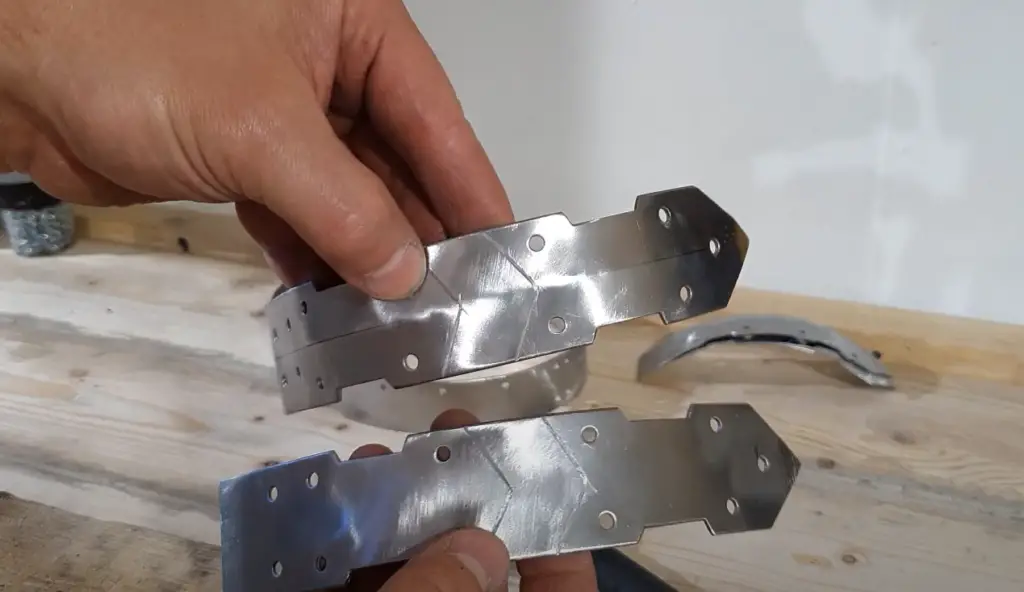
You can then use the jigsaw to cut out any interior pieces.Step 3: Dishing And Planishing
The next step is to dish and planish your helmet. This will give your helmet its signature concave shape. To do this, you will need a dishing stump, a dishing hammer, and a planishing hammer. First, place your helmet over the dishing stump. Make sure that the area you are working on is flat and level. Then, use the dishing hammer to gently push down on the top of the helmet. Work slowly and evenly until you have achieved the desired shape. Next, flip your helmet over and place it on the anvil part of the planishing hammer. Again, work slowly and evenly until you have achieved the desired shape.
Step 4: Welding
The next step is to weld your helmet together. If you are not comfortable welding, you can skip this step and rivet your helmet together instead. To weld your helmet, you will need a MIG welder and a grinding wheel. First, put on your welding mask and gloves. Then, start by welding along the edge of one of the pieces. Work slowly and evenly, making sure that each weld is strong.
If you are riveting your helmet together, you will need rivets and a hammer. First, start by placing a rivet in each of the holes along the edge of one of the pieces. Then, use the hammer to gently tap each rivet until it is flush with the surface of the metal. Repeat this process for each piece until all of the pieces are securely fastened together.
Step 5: General Polishing
The next step is to polish your helmet. To do this, you will need an orbital sander with sandpaper (120 grit), a polishing wheel, and a buffing wheel. First, use the orbital sander to sand down the entire surface of your helmet. Be sure to sand in the same direction as the grain of the metal. Next, use the polishing wheel to buff out any scratches or imperfections. Finally, use the buffing wheel to give your helmet a high shine.
Step 6: Face Mask
Next step is to add a face mask to your helmet. This will help to protect your face from debris and enemy attacks. To do this, you will need a piece of sheet metal, a jigsaw, and a welding torch. First, use the jigsaw to cut out a face-shaped piece of sheet metal. Next, use the welding torch to attach the piece of metal to the front of your helmet. Be sure to weld it on securely so that it does not come loose.
Step 7: Details
Now you can add any desired details to your helmet. There are plenty of ways to do this, for example you could add some Vikings symbols or engravings. Also, you could paint your helmet to make it look even more authentic. If you are not comfortable doing any of these things, you can simply leave your helmet as is.
Step 8: Ear Cops
Now you have to do and add ear cops to your helmet. You can find them online or do it yourself. To do it yourself, you will need a piece of metal, a hammer, and an anvil. First, use the hammer to flatten out the piece of metal. Next, use the anvil to shape the metal into ear-shaped cops. Finally, attach the ear cops to your helmet using rivets or welding.
Step 9: Chainmail
Next step is to add chainmail to your helmet. This will give your helmet a more authentic look and will help to protect you from enemy attacks. To do this, you need a length of metal chain, pliers, and a welding torch. First, use the pliers to attach the length of the chain around the edge of your helmet.
Next, use the welding torch to weld the links of the chain together. Be sure to weld them on securely so that they do not come loose.
Step 10: Padding + Wrap Up
The final step is to add padding to your helmet. This will help to protect your head from bumps and bruises. To do this, you need a piece of soft leather, a sewing needle, and thread. First, cut out a piece of leather that is large enough to fit inside your helmet. Next, use the needle and thread to sew the piece of leather into place. Make sure that you sew it on securely so that it does not come loose. [2]
FAQ
Did Vikings have horns on their helmets?
The short answer is no. There is no evidence to suggest that any Viking wore horns on their helmet, in battle or otherwise. However, this does not mean that the horns were never used in conjunction with Viking helmets. In fact, many of the most famous images of Vikings show them wearing horns on their helmets.
It is likely that these images were created for ceremonial purposes, or to make the Vikings look more intimidating to their enemies. Whatever the reason, it is clear that horns and Viking helmets have become synonymous in popular culture.
If you are interested in making your own horned Viking helmet, there are a few different ways you can go about it. You can purchase a ready-made horned helmet, or you can make your own.
What size is a Viking helmet?
Most Viking helmets were about 25 inches in circumference. However, the size of the helmet would vary depending on the individual’s head size.
What materials were Viking helmets?
The most common helmet that Vikings wore was made of iron and steel. However, there were also some helmets made out of bronze. The iron and steel helmets were usually made by blacksmiths while the bronze helmets were made by jewelers or other artisans.
Viking helmets were often decorated with brass, copper, or silver. Sometimes horns were attached to the helmet as well.
Most Viking helmets had a nasal guard to protect the wearer’s nose. The nasal guard was usually made of iron or steel and was attached to the front of the helmet with rivets.
Some Viking helmets also had cheek guards to protect the wearer’s face from being cut by an opponent’s sword or ax.
Did Vikings wear metal helmets?
There is some debate as to whether or not metal helmets were actually used by the Vikings. Some historians believe that they may have only been used for ceremonial purposes, while others believe that metal helmets were indeed used in battle. However, there is no definitive answer.
One theory is that the Vikings may have used leather or cloth helmets lined with metal plates. This would explain why many Viking artifacts found today do not contain metal helmet fragments.
What metal were Viking helmets made of?
Viking helmets were most likely made of either iron or steel. However, some scholars believe that they may have also been made of bronze or even leather. The type of metal used would have depended on the resources available to the Viking blacksmith at the time.
Iron and steel are both very strong metals that would have provided good protection against blows to the head in battle. However, iron is more susceptible to rusting than steel. This means that helmets made of iron would not have lasted as long as those made of steel.
Bronze is another strong metal that was used to make armor and weapons in ancient times. It is less prone to rusting than iron but more brittle than steel. This means that it would not
Useful Video: How to make Armor: MAKING A FULL STEEL VIKING HELMET!!! Part 1
Conclusions
Overall, making a Vikings helmet is not terribly difficult. However, it does require some time and effort. With a few simple tools and materials, you can make your own Viking helmet that will be the envy of all your friends. Just be sure to take your time and follow the instructions carefully. With a little patience, you’ll have a great looking helmet in no time! Thanks for reading!
References:
- https://www.imagininghistory.co.uk/post/make-a-viking-helmet-craft
- https://www.instructables.com/Steel-Viking-Helmet/