Do you want to take your GoPro videos to the next level? Want to be able to capture all of your extreme sports footage? If so, you need to learn how to mount a GoPro to a helmet! This can be a bit tricky, but in this article we will walk you through the process step-by-step. We will cover everything from choosing the right mount to avoiding common mistakes. So whether you are just starting out or are looking for some more advanced tips, read on for all the information you need!
Table of Contents
What Is A GoPro?
A GoPro is a small, digital camera that can be used to capture video and photos while you’re engaged in activities like surfing, skiing, or mountaineering. They’re popular with both amateur and professional adventurers because they’re rugged and easy to use. [4]
There are different types of GoPro cameras, but the most popular model is the Hero.
The GoPro Hero features:
- Wi Fi & Bluetooth
- Waterproof
- Touchscreen
- 1080p60 video
- 12MP photos
The Difference Between A GoPro And A Regular Camera
When it comes to image quality, there is a big difference between a GoPro and a regular camera. Regular cameras, on the other hand, are not built for this purpose and will generally produce lower-quality images and videos.
If you’re looking to capture high-quality images and video footage, then a GoPro is the camera for you. However, if you’re not planning on using your camera in extreme conditions, then a regular camera will suffice.
Where To Mount Your GoPro
Side Mount
The side mount is the most popular GoPro mount for helmets. You can use it to capture a variety of different angles, from first-person point of view (POV) to over-the-shoulder shots. It’s versatile and gives you a lot of options for framing your shots.
A few things to keep in mind when using a Side Mount:
- The side mount can make it difficult to access your GoPro’s controls. You’ll need to remove the camera from the mount to change settings.
- The side mount can obstruct your view when riding. This is less of an issue when using a rear-facing camera, but it’s something to keep in mind.
- The side mount can be more vulnerable to crashes than other mounts.
Top Mount
If you want to film yourself while riding, a top mount is the way to go. It gives you a first-person view of the action, and it’s great for getting shots of your face and the terrain in front of you.
A few things to keep in mind when using a Top Mount:
- The mount should be positioned in the center of the helmet, over the top of the visor.
- Make sure that the mount is level, so your footage isn’t crooked.
- Use an adhesive mount for extra security.
- Be aware of what’s in front of you when filming. Top mounts can obstruct your view if not positioned correctly.
Chin Mount
One of the most popular ways to mount a GoPro is on the chin of your helmet. This position is great for capturing footage of yourself skiing, biking, or engaging in other outdoor activities.
A few things to keep in mind when using a Chin Mount:
- The further forward you place the camera, the more stable it will be. However, if you place it too far forward, it will be difficult to see the LCD screen.
- You may need to experiment with different positions to find the one that works best for you.
- Make sure the camera is level, or you will end up with footage that is tilted to one side.
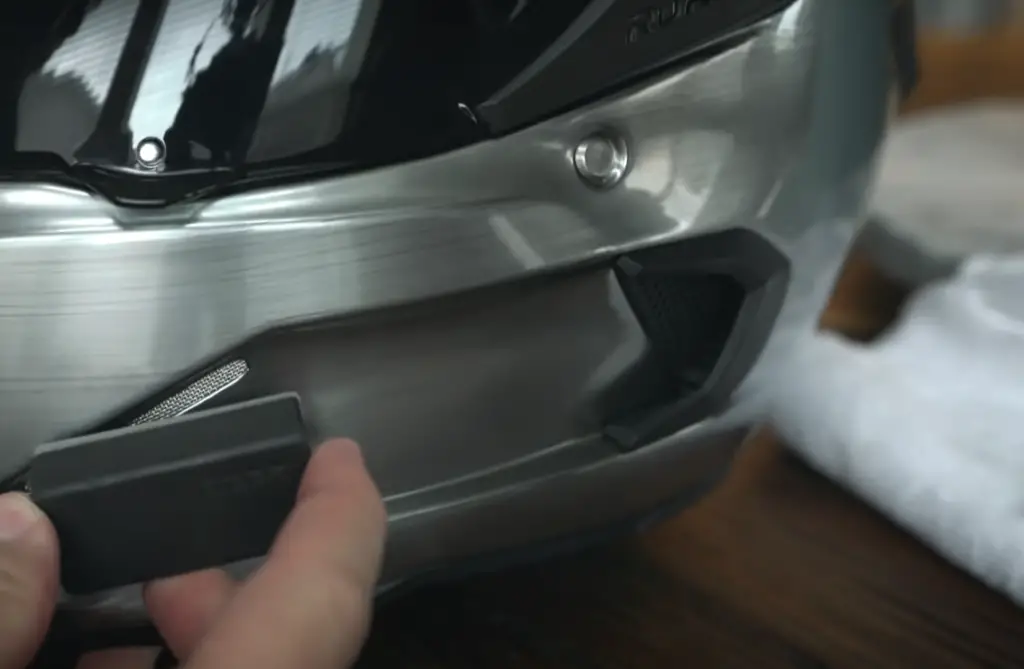
Strap Mount
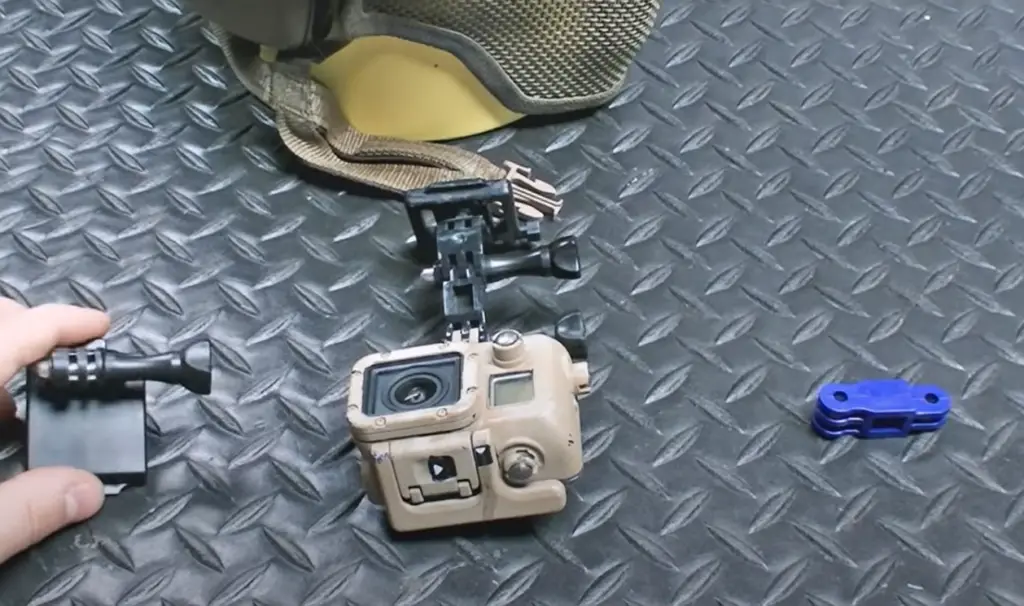
The GoPro strap mount is the most versatile and easiest way to mount your GoPro to a helmet. [2]
![The GoPro strap mount is the most versatile and easiest way to mount your GoPro to a helmet. [2]](https://helmetsguide.com/wp-content/uploads/2022/09/how-to-mount-a-gopro-to-a-helmet2.png)
This method works with any type of helmet, including full-face mountain bike helmets and motocross helmets. It’s also relatively inexpensive and quick to set up. The only downside is that it can be a bit tricky to get the perfect angle with this method. But with some trial and error, you should be able to get it dialed in pretty well.
A few things to keep in mind when using a Strap Mount:
- Make sure the mount is positioned in a place where it won’t interfere with your vision.
- You’ll want to use the shortest strap possible to minimize movement and vibration.
- For extra stability, you can add some adhesive mounts or zip ties to secure the mount even further.
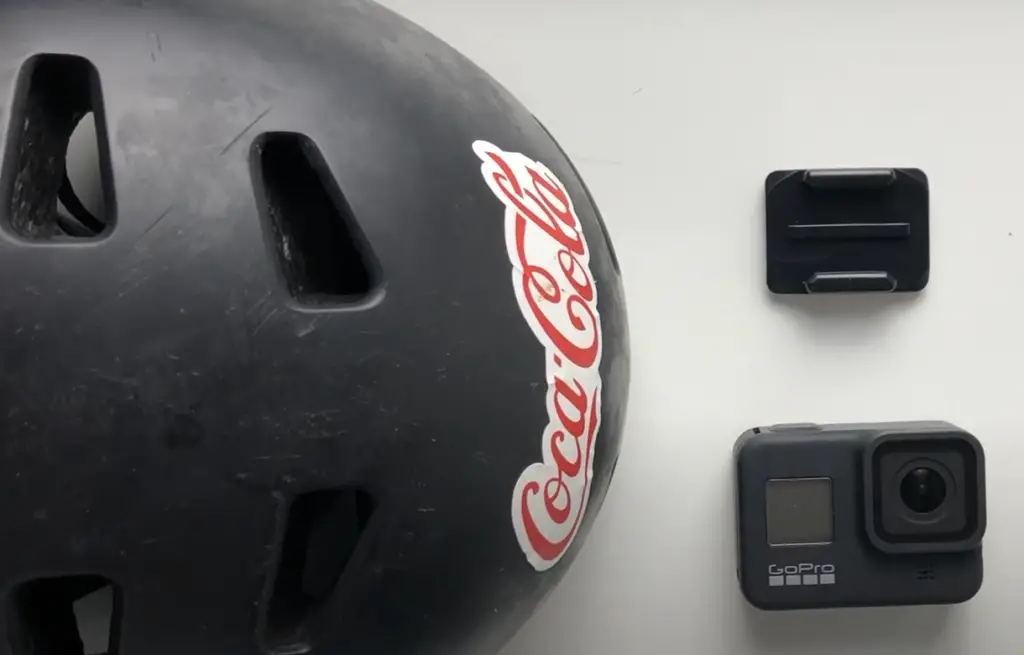
How To Attach GoPro
Applying The GoPro
There are a couple different ways that you can attach a GoPro to your helmet.
You can attach them to just about any surface, including helmets.To attach an adhesive mount:
- Step 1: Remove the backing from the adhesive mount.
- Step 2: Apply the adhesive mount to your desired location on the helmet.
- Step 3: Press down on the mount to secure it in place.
- Step 4: Attach your GoPro camera to the mount.
Side Mount
To attach a side mount:
- Step 1: Use the adhesive mounts to attach the camera housing to the side of your helmet.
- Step 2: Use a thumb screw to secure the mount in place.
- Step 3: Attach your GoPro camera to the mount.
Top Mount
To attach a top mount:
- Step 1: Clean the area of your helmet where you will be attaching the mount with isopropyl alcohol.
- Step 2: Peel back the adhesive liner on the GoPro mount and apply it to your helmet.
- Step 3: Once the adhesive has had time to set, attach your GoPro camera to the mount.
Chin Mount
To attach a chin mount:
- Step 1: Use the adhesive mounts to attach the GoPro camera to the bottom of the helmet, making sure that it is centered and level.
- Step 2: Attach the quick release mount to the GoPro camera.
- Step 3: Place the chin mount on your chin, making sure that it is comfortable and secure.
- Step 4: Adjust the GoPro camera so that it is pointing in the desired direction.
Strap Mount
To attach a strap mount:
- Step 1: Place the mount onto the helmet. Make sure that it is positioned in a way that will not obstruct your view.
- Step 2: Take the strap and loop it around the back of the helmet.
- Step 3: Secure the strap by threading it through the mount and then tightening it.
- Step 4: Attach the GoPro to the mount.
- Step 5: Test the GoPro to make sure that it is secure and will not fall off while you are wearing the helmet.
How To Attach GoPro on Irregular Shaped Helmets
Tools and materials needed :
- Epoxy putty
- Masking tape
- Sand paper
- 3 M VHB Type
- Paint
Surface cleaner
Step 1: Prepare the helmet
- Wash the helmet with soap and water.
- Rinse the helmet with clean water.
- Dry the helmet completely.
- Lay down masking tape around the area you will be working on.
Step 2: Prepare GoPro mount
- Remove the 3m double-sided adhesive from the GoPro mount.
- Sand the bottom of the GoPro mount top make it stick better.
Step 3: Attach GoPro mount to helmet
- Put epoxy putty on the back of the GoPro mount.
- Press the GoPro mount onto the helmet.
- Clean it with a surface cleaner.
- Let it dry
Step 4: Remove the mount from the helmet
- Peel the masking tape from the helmet.
- Remove the GoPro mount from the helmet.
- Clean up any residue with a surface cleaner.
- Let it dry
Step 5: Sand the sides of the epoxy putty
- Sand the sides of the epoxy putty.
- Be sure to remove any excess sanding debris.
Step 6: Paint the GoPro mount
- Apply paint to the GoPro mount.
- Let it dry
Step 7: Stick the 3M VHB Type adhesive to the mount
- Remove the backing from the adhesive.
- Press the adhesive onto the GoPro mount.
- Let it dry
Step 8: Attach your GoPro mount on your helmet
- Clean the area of the helmet where the mount will be attached.
- Remove the backing from the adhesive.
- Press the GoPro mount onto the helmet.
Step 9: Check that the GoPro is secure
- Test that your GoPro is secure by trying to move it with your hands.
That’s it! You’ve now successfully mounted your GoPro to your helmet. [1]
Is It Safe To Mount A GoPro On A Helmet?
The short answer is yes, it is perfectly safe to mount a GoPro on your helmet. In fact, many professional athletes and daredevils use GoPro to capture their death-defying stunts! [5]
However, there are a few things you should keep in mind to ensure that your GoPro is mounted securely and will not come loose while you’re shredding the slopes or hitting the trails. Here are a few tips:
- Make sure that the surface of your helmet is clean and smooth before attaching the mount. Any dirt or debris could cause the adhesive to not stick properly.
- Use an appropriate adhesive for your particular helmet material. For example, if you have a plastic helmet, you’ll want to use an acrylic-based adhesive.
- Be sure to follow the instructions that come with your particular GoPro mount. Each mount is slightly different, so it’s important to read the directions carefully.
By following these simple tips, you can rest assured that your GoPro will be securely attached to your helmet and ready to capture all of your adventures!
Another GoPro Helmet Mount Ideas
If you want to get creative with your GoPro helmet mount, there are a few other options available to you.
First, you could try mounting your GoPro to the back of your helmet using a rear mount. This is perfect for getting some great action shots of yourself in action.
Also you can drill holes in your helmet and use zip ties to secure the GoPro. Just make sure that the zip ties are tight enough so that they don’t come loose while you’re riding.
Another great option is to attach a tripod to your helmet using VELCRO or some other type of adhesive. This gives you a lot of flexibility in terms of where you can place your GoPro and how you can angle it.
Finally, you could also buy a helmet with a built-in GoPro mount. This is becoming increasingly popular as more and more people are using GoPro to capture their adventures. [3]
Tips To Get Good GoPro Footage
There are a few things you can do to make sure you get great GoPro footage from your helmet mount.
- Learn how to use GoPro’s field of view settings. The GoPro has a wide field of view by default, but you can change this setting to narrow or super view if you want a more focused shot.
- Choose the right location for your camera. You’ll want to avoid putting the camera in a spot where it will be constantly jarred by bumps and vibrations. Instead, try to mount the camera in a spot where it will have a clear view of the action.
- Move slowly and smoothly when you’re first getting used to the GoPro. Sudden movements can cause the camera to produce shaky footage.
- Be aware of your surroundings. If you’re mounted in a spot where there’s a lot of activity, make sure you keep an eye on what’s going on around you so you don’t accidentally hit something with the camera.
- Try different angles. The GoPro is a versatile piece of equipment, so don’t be afraid to experiment with different ways of mounting it. You may find that you get better footage from an unconventional angle than you would from the traditional head-on view.
With these tips in mind, you should be able to get great footage from your GoPro helmet mount.
FAQ
Is a GoPro video better than an Iphone?
The video quality of a GoPro is much higher than that of an iPhone. It has a higher frame rate and can shoot in HDR. The GoPro also has a wide angle lens that allows you to capture more of the scene.
However, the iPhone is much more convenient to use. It is small and light and can be mounted in many different ways. The GoPro is also very difficult to mount on a helmet by yourself. You will need someone to help you with this.
Can A GoPro Take Pictures?
Yes! In fact, many people use GoPro to capture photos and videos while they’re engaged in activities like skiing, surfing, and biking. The cameras are designed to be mounted on helmets, body parts, or other gear, so you can get a first-person perspective of the action.
Which GoPro is best for a helmet?
There are a few GoPro models that work great for mounting to a helmet. The GoPro HERO Session is a good choice because it’s small and lightweight, making it easy to attach to your helmet. The GoPro HERO+ LCD is another option that includes an LCD screen so you can see what you’re filming while you’re wearing the camera.
Which GoPro is best for Motovlog?
The best GoPro for Motovlogging is the GoPro Hero Session. It’s small and lightweight, making it easy to mount on your helmet. Plus, it has great image stabilization so your videos will be smooth and steady. And the built-in microphone gives clear audio, even at high speeds.
If you’re looking for a more budget-friendly option, the GoPro Hero+ is a good choice. It doesn’t have all the bells and whistles of the Hero Session, but it still takes great video and photos. And it’s very easy to use, so you’ll be up and running in no time.
What do you need for Motovlog?
- Content
- Camera
- Mounting device
- Editing software
If you want to get started with motovlogging, there are a few things you’ll need. First and foremost, you’ll need content. What are you going to film? Will it be helpful or entertaining to others? Once you have an idea of the type of content you want to create, it’s time to choose a camera.
There are a lot of great cameras on the market these days, but for motovlogging we recommend using a GoPro. They’re small, lightweight, and can be easily mounted to your helmet (more on that later).
In terms of mounting devices, there are a few different options available. Again, we recommend something that is small and lightweight so it doesn’t add too much bulk to your helmet.
Finally, you’ll need some editing software to put everything together. If you’re just getting started, there are a lot of great free options available. Once you have all of these things, you’re ready to start motovlogging!
Can you mount a GoPro to any helmet?
The GoPro camera is one of the most versatile and widely used action cameras on the market. Thanks to its small size and durability, it can be mounted on just about any surface, including helmets.
What is the best place to put a GoPro on a helmet?
The best place to put a GoPro on a helmet is typically on the top or side of the helmet. This allows you to get the most stable footage and ensures that the camera will be in frame no matter what happens.
Where should I mount my GoPro on my ski helmet?
There are a few different places you can mount your GoPro on a ski helmet. The most popular spot is on the top of the helmet, centered between your goggles and forehead. This gives you an unobstructed view of the slopes while skiing and keeps the camera out of the way of your field of vision. Other popular locations include the side or back of the helmet. These positions give you a different perspective of the action and can be helpful for filming tricks or other stunts.
Is it legal to mount a camera on your motorcycle helmet?
The simple answer is yes, it is legal. In fact, there are even laws in place that require motorcycle riders to wear a helmet with a mounted camera.
Are GoPro mounts waterproof?
The GoPro mounts that come with your camera are not waterproof. If you want to use your GoPro in the water, you’ll need to buy a separate waterproof housing.
Does GoPro need a protective case?
The answer to this question is a resounding yes! GoPro cameras are designed for action, but that doesn’t mean they’re indestructible. In fact, the lenses on these little cameras are quite fragile and can be easily scratched or cracked if not properly protected. That’s why we highly recommend using a GoPro case whenever you’re mounting your camera to a helmet – or any other surface, for that matter.
Is epoxy putty safe to touch?
Epoxy putty is safe to touch after it has cured. However, while it is still curing, epoxy putty can release fumes that can be harmful if inhaled. It is important to work in a well-ventilated area when using epoxy putty.
Epoxy putty is also safe to use on skin. However, if you have sensitive skin, you may want to wear gloves to protect your hands from the putty.
If you do get epoxy putty on your skin, it can be removed with soap and water.
Useful Video: The BEST GoPro Helmet Mount Setup (for EVERY Helmet) | *Plus GoPro settings!*
Conclusions
So, there you have it! Our complete guide on how to mount a GoPro to a helmet. We hope you found this article helpful and that it has given you the information and confidence you need to get out there and start filming your own amazing videos. Thank you for reading!
References:
- https://www.instructables.com/GoPro-Mount-modification-for-irregular-shaped-helm/
- https://filmora.wondershare.com/action-camera/gopro-helmet-mounts-how-to-use.html
- https://www.photodoto.com/how-to-mount-gopro-on-ski-helmet/
- https://digitalworldbeauty.com/what-is-a-gopro-camera-used-for
- https://whatsabyte.com/safe-mount-action-camera-helmet-
- https://www.bosshunting.com.au/lifestyle/technology/how-to-make-your-gopro-footage-actually-look-good/