Motorcycle helmets are a necessary piece of gear for any rider, but they can also be expensive. If you want to keep your helmet in good condition for as long as possible, it’s important to know how to wrap it properly.
In this guide, we will answer some common questions about motorcycle helmet wrapping and provide some useful tips that will help you do it correctly.
Table of Contents
Can You Wrap a Motorcycle Helmet?
Yes, you can wrap a motorcycle helmet. In fact, wrapping your motorcycle helmet is one of the best ways to protect it from scratches, dents, and other damage.
There are two main types of helmet wraps: full wraps and partial wraps. Full wraps cover the entire helmet, while partial wraps only cover part of the helmet.
Prepare Your Workstation
There are several reasons why you might want to wrap your motorcycle helmet:
- Protect the helmet from damage. A wrap will help to keep the helmet looking like new, even if it takes a few bumps and scrapes;
- Wrapping your motorcycle helmet is for added comfort. A wrap can help to pad the inside of the helmet, making it more comfortable to wear;
- Some people also use wraps to customize the look of their helmets. Wraps come in a wide variety of colors and designs, so you can really make your helmet stand out from the crowd;
Whatever your reason for wrapping your motorcycle helmet, you’ll need to gather a few supplies before you get started.
You’ll need:
* A clean, dry helmet;
* A motorcycle helmet wrap kit (available from most motorcycle stores);
* A sharp pair of scissors;
* A ruler or measuring tape;
Gather the Tools Needed
Before you get started, make sure you have all the tools and materials you need. This includes:
- A helmet;
- Several sheets of newspaper or a drop cloth;
- A can of spray paint specifically designed for use on plastics;
- Painters tape;
- A pair of scissors;
Once you have all of the above, you’re ready to get started.
Remove Hardware (heat if needed)
Remove any hardware, such as visors or straps, from the helmet. If these items are glued on, you may need to use a heat gun to loosen the adhesive.
Clean the Helmet
Thoroughly clean the helmet with soap and water to remove any dirt, grease, or other debris. This will help the paint to better adhere to the surface.
Tape Off the Areas You Don’t Want to Be Painted
Use painter’s tape to cover any areas of the helmet that you don’t want to be painted. This includes the straps, visors, and padding.
Spray Paint the Helmet
Once everything is taped off, it’s time to start painting. Use even, sweeping strokes to apply the paint evenly to the surface. You may need to apply several coats in order to achieve full coverage.
Let the Paint Dry
Once you’re finished painting, let the helmet dry for at least 24 hours before reassembling it. This will ensure that the paint is fully cured and won’t come off when you put the helmet back together.
Now that you know how to wrap a motorcycle helmet, put your new skills to the test and give your helmet a fresh new look.
Fill Any Scratches or Dents
The first step is to smooth out any surface imperfections. This will help the wrap adhere better and also give you a neater, more polished look.
Use a putty knife or sandpaper to fill in any dents or scratches. If your helmet has a lot of surface damage, you may want to consider starting with a new helmet.
Wipe Down the Surface
Once you’ve filled any dents or scratches, wipe down the surface of the helmet with a clean cloth. This will remove any dirt, dust, or grease that could prevent the wrap from adhering properly.
Measure and Cut the Wrap
Before you start applying the wrap, you’ll need to measure and cut it to the right size. Start by measuring the circumference of your helmet. Then, add a few inches to that number so you have enough wrap to work with.
Once you’ve cut the wrap to size, test it out by wrapping it around your helmet. If it’s too big or too small, you can always trim it down as needed.
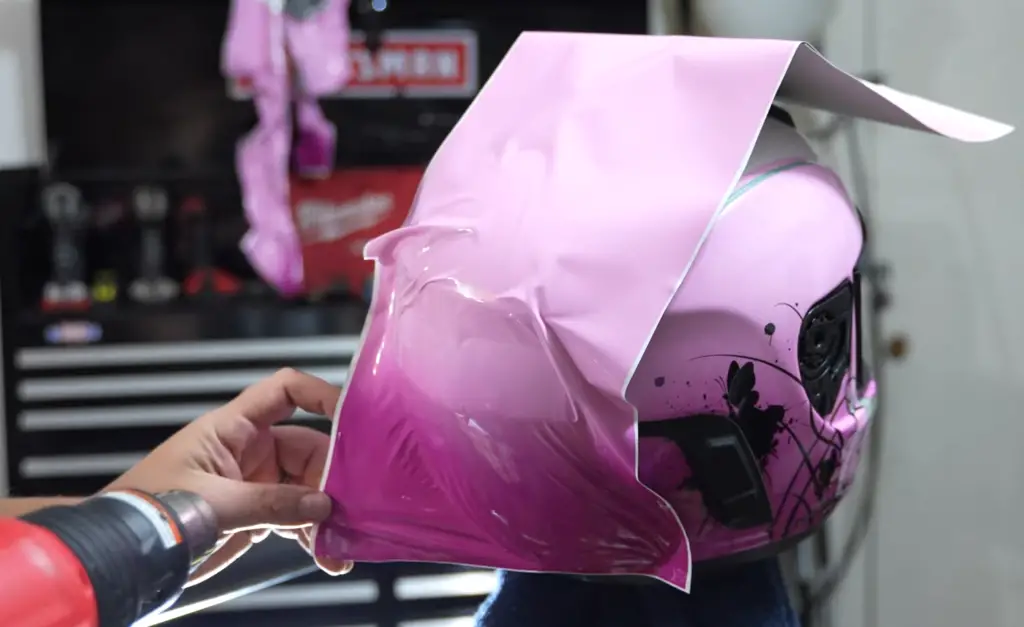
Apply the Wrap
Now, it’s time to apply the wrap to your helmet. Start by peeling off a small section of the backing paper. Then, adhere that section to one side of the helmet.
Slowly peel away the rest of the backing paper as you apply the wrap to the helmet. Use a squeegee or your hands to smooth out any bubbles or wrinkles.
Trim the Excess Wrap
Once you’ve applied the wrap to the entire helmet, trim away any excess material. Use a sharp knife or scissors to cut along the edge of the helmet. Be sure to go slowly and be careful not to damage the helmet beneath the wrap.
Clean the Helmet’s Surface
The first step is to clean the helmet’s surface. You need to make sure that there is no dirt, grease, or other substances that can interfere with the wrap adhering properly.
If your helmet is particularly dirty, you may need to use a degreaser or other cleaning agent. Once you’ve cleaned the helmet’s surface, you should rinse it off with water and dry it completely with a clean microfiber cloth. [1]
Measure and Cut the Vinyl Wrap
Once the helmet is clean and dry, it’s time to measure and cut the vinyl wrap. You’ll want to make sure that you have enough vinyl to wrap around the entire helmet, plus a little extra just in case.
When cutting the vinyl, be sure to use a sharp blade so that you get clean, straight lines. Once the vinyl is cut to size, remove any excess material that you won’t be using.
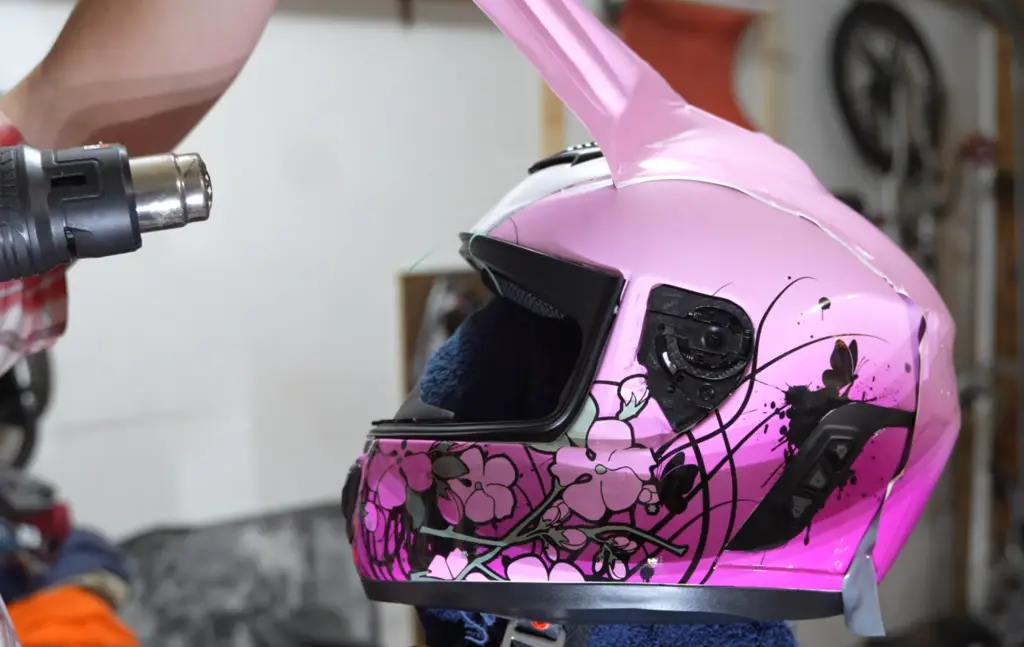
Heat up the Vinyl Wrap
Now it’s time to heat up the vinyl wrap. This will make it more pliable and easier to work with. You can use a heat gun or a hairdryer for this step.
Just be careful not to heat the vinyl up too much, as it can become fragile and more likely to tear.
Trim the Excess Vinyl
Once you’ve applied the vinyl wrap, you can trim off any excess material. Just be sure to use a sharp blade so that you don’t damage the vinyl.
You can also use a heat gun or hair dryer to help seal the vinyl to the helmet. Just be careful not to overheat the vinyl, as this can cause it to become brittle and crack.
Heat the Wrap
If you’re having trouble getting the vinyl to adhere to the helmet, you can try heating it up. This will make the vinyl more pliable and easier to work with.
Just be careful not to overheat the vinyl, as this can cause it to become brittle and crack.
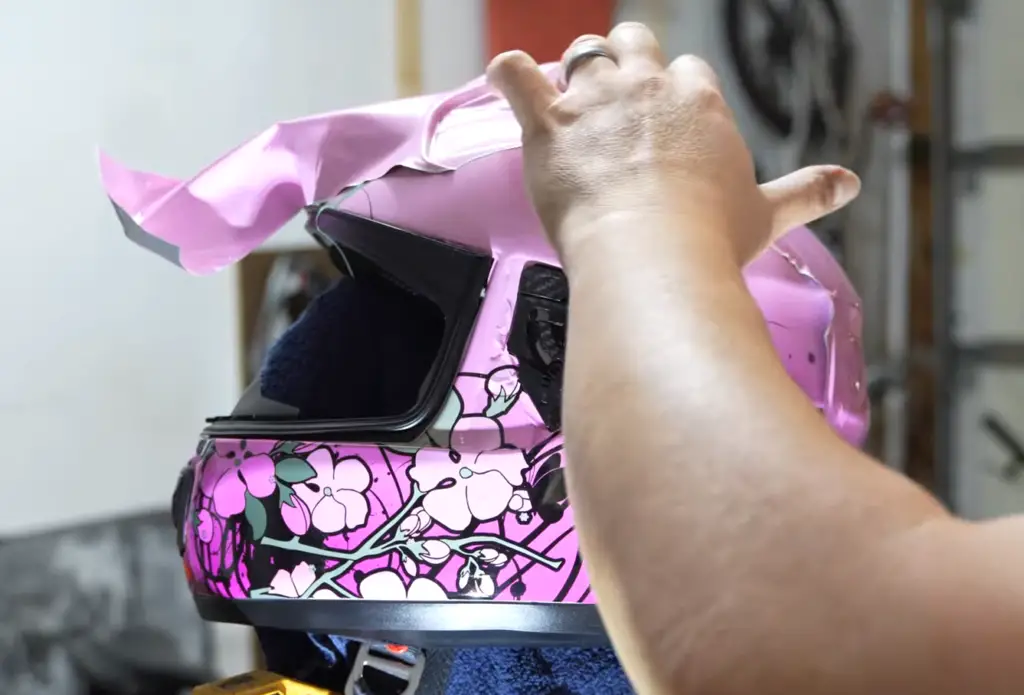
Stretch and Apply
The first step is to stretch the vinyl over the helmet. You’ll need to use your hands to apply pressure evenly over the entire surface. If there are any wrinkles, you can try using a heat gun to remove them.
Work Out the Air Bubbles (pin prick if needed)
Start by making sure the vinyl is as smooth as possible. If there are any air bubbles, work them out by gently pushing from the center of the bubble toward the edge with a pin.
If this doesn’t work, you can also try to prick the bubble with the pin and then push the air out.
Secure the Edges
The most important part of wrapping a motorcycle helmet is securing the edges. If the edges are not properly secured, the wrap will not stay in place and will eventually peel off. To secure the edges, use clear packing tape or double-sided tape.
Trim the Edges
Once the edges are secured, trim any excess wrap from the edges of the helmet. Use a sharp knife or scissors to avoid leaving jagged edges.
Heat Seal the Wrap
If you are using a heat-activated vinyl wrap, use a heat gun to seal the edges of the wrap. This will help the wrap adhere to the helmet and prevent it from peeling off.
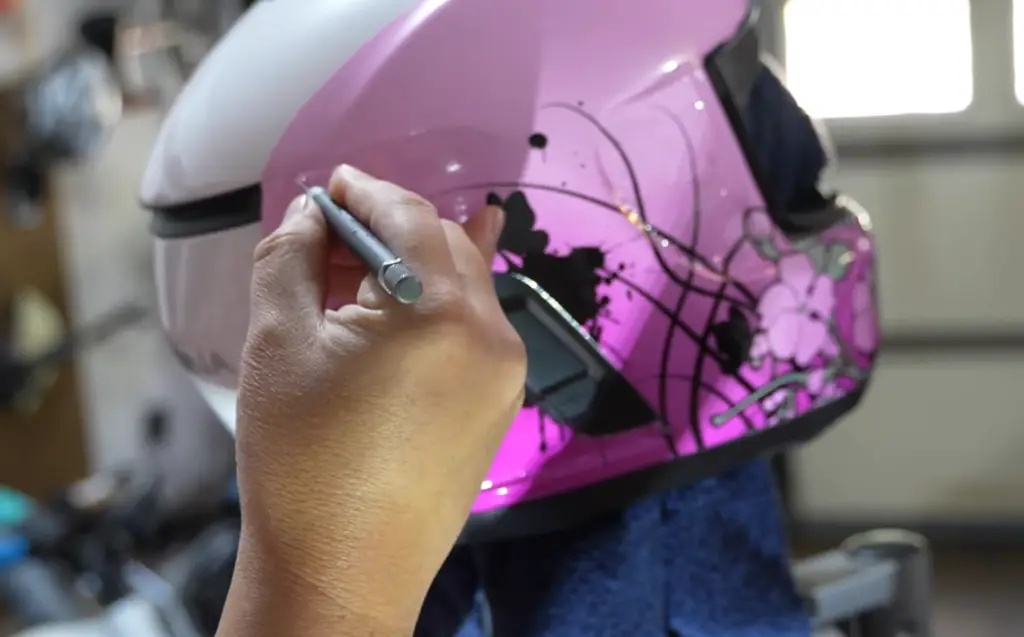
Apply Decals
After the vinyl wrap is applied, you can add decals or other graphics to personalize your helmet. Be sure to use decals that are designed for use on the vinyl wrap.
Reattach Hardware
Make sure to use the screws, bolts, and snaps to reattach all of the hardware to your helmet. These are important parts that keep your helmet together and secure. Make sure they are all accounted for and attached properly. [1]
Applying Wrap in 1 Piece
If you want to apply your wrap in one piece, it’s important to have a little bit of experience with vinyl wrapping. This method is definitely the more difficult of the two, but it will give you a much cleaner look.
If you’re not confident in your abilities, we recommend going with the multi-piece method instead.
FAQ
Can you put a wrap on a helmet?
Yes, you can put a wrap on a motorcycle helmet. You will need to purchase a helmet wrap kit which includes the vinyl wrap and adhesive. The process is similar to wrapping a car and the results are just as good.
What is the best way to clean a motorcycle helmet before wrapping it?
Can you vinyl wrap a ball?
Yes, you can vinyl wrap a motorcycle helmet. This is a process that is simple and does not require any special skills or equipment. You will need to purchase a vinyl wrap kit that includes the materials and instructions needed for the project.
What do you need to vinyl wrap a motorcycle helmet?
To vinyl wrap a motorcycle helmet, you will need the following supplies:
- Vinyl wrap;
- Utility knife;
- Scissors;
- Ruler or measuring tape;
- Pencil or pen;
- Squeegee;
- Hairdryer;
How to vinyl wrap a motorcycle helmet?
- Start by cleaning the helmet with soap and water to remove any dirt or grease;
- Cut the vinyl wrap to size. Use a ruler or measuring tape to measure the helmet, then add an extra few inches on all sides to account for wrapping around curves. Cut the vinyl with a utility knife or scissors;
- Apply the vinyl wrap to the helmet, starting at the top. Use a squeegee to smooth out any bubbles or wrinkles;
- Wrap the vinyl around the sides of the helmet, smoothing it as you go;
- Trim the excess vinyl from the bottom of the helmet with a utility knife or scissors;
- Apply heat to the vinyl with a hairdryer to help it conform to the helmet’s curves;
Your motorcycle helmet is now wrapped and protected from scratches and weathering! Enjoy the ride!
Can you wrap a motorcycle gas tank?
Yes, you can wrap a motorcycle gas tank. However, it is important to note that you should only do this if the tank is made of metal. If the tank is made of plastic, wrapping it could cause the material to become brittle and break.
When wrapping a motorcycle gas tank, be sure to use a heat-resistant vinyl wrap. This will protect the tank from any heat that is generated while riding.
How do you remove a motorcycle helmet?
There are a few ways to remove a motorcycle helmet, but the most common method is to simply unbuckle the chin strap and lift the helmet off of your head.
If your helmet has a shield, you may need to remove it before you can take the helmet off. To do this, simply look for the release lever on the side of the helmet and push it in to release the shield.
Once the shield is removed, you should be able to lift the helmet off of your head without any issues.
Can I paint my motorcycle helmet?
Yes, you can paint your motorcycle helmet. However, it is important to note that you will need to use a special automotive paint that is designed for plastic surfaces.
Before painting your helmet, be sure to clean it with a mild soap and water solution. Once the helmet is clean, you can then begin to apply the paint.
It is important to note that you will need to apply several coats of paint in order to get a smooth and even finish. Allow each coat of paint to dry completely before applying the next one.
Can you wrap a motorcycle gas tank?
Yes, you can wrap a motorcycle gas tank. There are a few things you need to keep in mind when wrapping a motorcycle gas tank, such as the type of vinyl wrap you use and how you prepare the surface.
Can I vinyl-wrap my motorcycle helmet?
Yes, you can vinyl wrap your motorcycle helmet! There are many benefits to doing so, including protecting your helmet from scratches and weather damage. You can also choose a unique look for your helmet.
Make sure you select a high-quality vinyl wrap that is specifically designed for use on helmets and follow the manufacturer’s instructions carefully.
Can you wrap motorbike helmets?
The quick answer is yes, you can wrap motorcycle helmets. Motorcycle helmet wraps are a popular way to customize the look of your helmet and protect it from scratches, scuffs, and UV rays.
What do you need to wrap a motorcycle helmet?
The materials you’ll need to wrap a motorcycle helmet depend on the type of wrap you’re using. For example, if you’re using a decal wrap, you’ll just need the decals and some clear tape. If you’re using a vinyl wrap, you’ll need vinyl wrap material, a utility knife, and some clear tape.
How to wrap a motorcycle helmet with decals?
Applying decals to a motorcycle helmet is a relatively simple process. Just clean the surface of the helmet, apply the decals, and then seal them with clear tape.
Most motorcycle riders know that it’s important to wear a helmet whenever they hit the road. But did you know that you can actually improve the performance of your helmet by wrapping it?
Helmet wraps are becoming increasingly popular among motorcycle riders, and for good reason. Not only do they add a bit of personality to your gear, but they can also protect your helmet from scratches and UV rays.
What is a helmet wrap?
Why wrap your motorcycle helmet?
There are actually a few good reasons to wrap your motorcycle helmet:
- Protection: A vinyl or decal wrap can help protect your helmet from scratches, UV rays, and other wear and tear;
- Style: Wraps are a great way to add personality to your gear and make your motorcycle helmet stand out from the rest;
- Cost: Wraps are usually cheaper than buying a new paint job for your helmet;
How much does it cost to wrap a motorcycle helmet?
The cost of wrapping a motorcycle helmet will depend on the type of wrap you choose and the size of your helmet. For example, a small decal wrap might cost around, while a large vinyl wrap could cost up to 0.
What are the best motorcycle helmet wraps?
The best motorcycle helmet wrap for you will depend on your personal preferences. Decal wraps are typically cheaper and easier to apply, but they might not offer as much protection as vinyl wraps.
Vinyl wraps are more durable and offer more protection, but they can be more difficult to apply.
How do you wrap a motorcycle helmet with vinyl?
Applying a vinyl wrap to a motorcycle helmet is a bit more challenging than applying a decal wrap.
You’ll need to use a utility knife to cut the vinyl wrap to size, and then apply it to the surface of the helmet. Once the vinyl wrap is in place, you can use clear tape to seal it.
How do you remove a motorcycle helmet wrap?
If you ever need to remove your motorcycle helmet wrap, the process will depend on the type of wrap you’re using. Decal wraps can usually be peeled off without damage, but vinyl wraps will need to be cut off with a utility knife.
How long do motorcycle helmet wraps last?
Most motorcycle helmet wraps will last for several years if they’re properly cared for. However, decal wraps might not last as long as vinyl wraps.
How can I make my motorcycle helmet wrap last longer?
There are a few things you can do to make your motorcycle helmet wrap last longer:
- Avoid washing your helmet too often, as this can cause the wrap to peel;
- Store your helmet in a cool, dry place when you’re not using it;
- Avoid exposing your helmet to excessive heat, as this can cause the wrap to shrink;
Where can I buy a motorcycle helmet wrap?
There are many different places where you can find motorcycle helmet wraps. However, it is important to make sure that you are buying a high-quality wrap. If you don’t, the wrap might not look good or it might not last very long.
How to Wrap a Motorcycle Helmet
If you’re looking for a way to add personality to your motorcycle helmet, or if you want to protect your helmet from scratches and UV rays, consider wrapping it.
Wrapping a motorcycle helmet is a bit more challenging than applying a decal wrap, but the results are worth it.
Useful Video: How I Vinyl Wrap Motorcycle Helmets
Conclusion
In conclusion, there are a few things you should keep in mind when wrapping your motorcycle helmet. First and foremost, always use caution when working with tape or any other type of adhesive.
Make sure the surface is clean and free of any dirt or debris before applying the wrap. Also, be sure to measure and cut the wrap accurately to avoid any unnecessary wrinkles or creases. Finally, use good-quality tape to secure the wrap in place.
If you follow these simple steps, you can ensure that your helmet will be well-protected and look great too!
References:
- https://motofour.com/how-to-wrap-a-motorcycle-helmet-in-15-steps/